- Create a new Post or Add it to an existing post.
- Click on the TV icon
- Embed Video
- Browse to where it is saved
- Title it - this is what everyone will see as the name
- Select Upload
- The window will change
- Select the Local Video tab if it is not already active
- Select your video
- Click Insert
- A link to your movie will appear in the post body.
- Select a category
- Publish or Update the post
Tuesday, December 14, 2010
Add Video you Created to Your Blog
Embed your video into your blog.


Monday, December 13, 2010
Congratulations
 The students have been working on their keyboarding skills using UltraKey 5.0 during school hours and Typing Pal after school.
 Students should complete Lesson 5 by the end of Quarter 2, Dec. 17. They can practice at home 3 times a week using Typing Pal for 15 minutes at a time.
Username is first name, followed by fiirst intial of last name, follwed by 8 digit technology number. (NancyG20123456)
The expectations are:
3rd grade - 15 WPM with 94% accuracy (15/94)
4th grade - 20 WPM with 96% accuracy (20/96)
5th grade - 25 WPM with 98% accuracy (25/98)
We have several students who have completely finished UltraKey 5.0
3rd Grade
Julie 18/97 (Nov. 22)
4th Grade
Emily 45/98 (Nov. 24)
Shereen 25/96 (Nov. 23)
Henrick 23/95 (Nov. 23)
Justin 30/96 (Nov. 23)
Henry 33/96 (Nov. 23)
Catherine 55/98 (Nov. 22)
Sue - 28/98 (Nov. 22)
Coco - 35/98 (Nov. 22)
Kelly 47/98 (Nov. 22)
5th Grade
Edward 45/98 (Dec. 13)
Max 38/98 (Dec. 13)
Clara 30/98 (Dec. 13)
Jasper 35/98 (Dec. 13)
Max 38/98 (Dec. 13)
Emily 28/98 (Dec. 13)
Asia 52/98 (Dec. 13)
Eli 35/98 (Dec. 13)
Janice 75/98 (Dec. 13)
Mia 29/98 (Dec. 13)
Melissa 35/98 (Dec. 13)
Lia 30/98 (Dec. 13)
Max 38/98 (Dec. 13)
Clara 30/98 (Dec. 13)
Jasper 35/98 (Dec. 13)
Max 38/98 (Dec. 13)
Emily 28/98 (Dec. 13)
Asia 52/98 (Dec. 13)
Eli 35/98 (Dec. 13)
Janice 75/98 (Dec. 13)
Mia 29/98 (Dec. 13)
Melissa 35/98 (Dec. 13)
Lia 30/98 (Dec. 13)
Brent 56/100 (Nov. 22)
Nicholas 44/98 (Nov. 22)
Monica 98/99 (Nov.22)
Nicholas 44/98 (Nov. 22)
Monica 98/99 (Nov.22)
Congratulations to all. There are many more who will be joining this list very shortly!
Wednesday, December 8, 2010
Real or Not
Select one of the websites and determine if it is a reliable website or a hoax (something intended to trick or deceive). Leave a detailed comment explaining why you think it is a real website or why you think it is a hoax. Use the questions at the bottom to help you decide. Answer, at a minimum, one question from each area.
Google Technology
Google Translate for Animals
Buy an Ancestor Online
Pacific Northwest Tree Octopus
Boilerplate
Very Exciting Fredericton
Cat Reactions to Bearded Men
Authority
Currency
Content/Purpose
Audience
Structure/Workability
Google Technology
Google Translate for Animals
Buy an Ancestor Online
Pacific Northwest Tree Octopus
Boilerplate
Very Exciting Fredericton
Cat Reactions to Bearded Men
Authority
- Who is responsible for the site?
- Is this site published by a person, an organization or a company?
- What are their credentials?
- Do they have any Expertise or experience on the topic?
- Is the information they provide likely to be reliable and trustworthy?
Currency
- How current is the site?
- Are there broken links?
- Is the information outdated?
- Is this information which needs to be constantly updated?
Content/Purpose
- Why does this site exist?
- What sort of information can I get from this site?
- Is the site designed to inform or entertain?
- Is this site trying to sell me something?
Audience
- Who is this site aimed at?
- Is the site easy to read?
- Does the overall design “look and feel” meet the needs of the audience?
Structure/Workability
- How easy is the site to use?
- How easy is to find the information I need?
- Do the pages load quickly?
- Could I use this site if I had a disability? (visually impaired: it can be read aloud or enlarged)
- Would I come back to this site in the future?
Thursday, December 2, 2010
How to Add Captions to Pictures in PowerPoint 2007
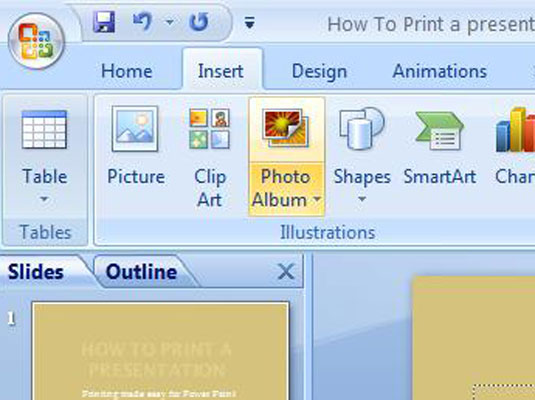
You can place captions under the pictures in your PowerPoint photo album. PowerPoint initially places the picture filename in the caption, but you can delete this caption and enter one of your own. To add captions follow these steps:
1. Open the Photo Album dialog box.
On the Insert Tab click the Photo Album button.
2. Open the Picture layout drop-down list to Fit to Slide.
Layout options are displayed.

3. Click the Captions Below ALL Pictures check box.

Wednesday, December 1, 2010
Renewable Energy Video
This is an exemplar for the 4th grade renewable energy project. The word were written by Anna in Mr. Hudson's class. The slides and narrations were created by me for the students to use as an example. Images were hyperlinked in PowerPoint and the links are added as a Credit slide for the movie.
[local /files/2010/12/RenewableEnergy1.wmv]
[local /files/2010/12/RenewableEnergy1.wmv]
Sunday, November 21, 2010
Real or Hoax
Select one of the websites and determine if it is a reliable website or a hoax (something intended to trick or deceive). Leave a detailed comment explaining why you think it is a real website or why you think it is a hoax. Use the questions at the bottom to help you decide. Answer, at a minimum, one question from each area.
Google Technology
Google Translate for Animals
Buy an Ancestor Online
Pacific Northwest Tree Octopus
Boilerplate
California's Velcro Crop
Very Exciting Fredericton
Cat Reactions to Bearded Men
Authority
Currency
Content/Purpose
Audience
Structure/Workability
Google Technology
Google Translate for Animals
Buy an Ancestor Online
Pacific Northwest Tree Octopus
Boilerplate
California's Velcro Crop
Very Exciting Fredericton
Cat Reactions to Bearded Men
Authority
- Who is responsible for the site?
- Is this site published by a person, an organization or a company?
- What are their credentials?
- Do they have any Expertise or experience on the topic?
- Is the information they provide likely to be reliable and trustworthy?
Currency
- How current is the site?
- Are there broken links?
- Is the information outdated?
- Is this information which needs to be constantly updated?
Content/Purpose
- Why does this site exist?
- What sort of information can I get from this site?
- Is the site designed to inform or entertain?
- Is this site trying to sell me something?
Audience
- Who is this site aimed at?
- Is the site easy to read?
- Does the overall design “look and feel” meet the needs of the audience?
Structure/Workability
- How easy is the site to use?
- How easy is to find the information I need?
- Do the pages load quickly?
- Could I use this site if I had a disability? (visually impaired: it can be read aloud or enlarged)
- Would I come back to this site in the future?
Friday, November 12, 2010
Inspiration as .JPG
When the students have saved their Inspiration Graphical Organizer follow these steps.
[local /files/2010/11/InspirationToJPEG1.wmv]

- File
- Export...
- Choose the 4th tab Graphics File
- Select- .JPEG
- Save
- Select a name and location
- Save
- Upload to blog
[local /files/2010/11/InspirationToJPEG1.wmv]

Wednesday, November 10, 2010
Map Colors
- Blue - lakes, rivers, streams, oceans, reservoirs, highways, local borders
- Red - major highways, roads, urban areas, airports, special interest sites, military sites, place names, buildings, borders
- Yellow - built-up or urban areas
- Green - parks, golf courses, reservations, forest, orchards, highways
- Brown - deserts, historical sites, national parks, military reservations or bases, contour (elevation) lines
- Black - roads, railroads, highways, bridges, place names, buildings, borders
- Purple - highways, (also used on U.S.G.S. topographic maps to represent features added to the map since the original survey)
Tuesday, November 9, 2010
PowerPoint Guidelines
Text:
Images:
Color:
Sounds and Animations:
Transistions:
- Spelling, punctuation and grammar checked
- Bulleted lists (keywords)
- limit to 6 bullets
- San serif fonts (no extra lines, Arial) vs. serif (extra lines and squiggles, Giddyup)
- Consistent font
- Large enough to read from the back of the room (24pt)
- Left aligned is easier to read
Images:
- Relevant, pertain to topic
- 1-2 per slide
- Give credit: where did you get them
- Hyperlink to the webpage (NOT Google Images)
- Add a name if possible
Color:
- Limit the use of color to 2 to 4 colors/shades.
- Contrasting colors (black and white)
Sounds and Animations:
- Use sparingly, only to emphasis a point
- They should be appropriate to the topic
Transistions:
- Use the 1-2 thoughout the presentation
Sunday, November 7, 2010
Energy Sources
BrainPop - Natural Resources, Wind Energy, Solar Energy, Heat, and Fossil Fuels
Use the BrainPop CC (Closed Caption) option to read the words.
Energy Sources at NeoK12.com

Use the BrainPop CC (Closed Caption) option to read the words.
Energy Sources at NeoK12.com
National Geographic Alternative Energies
Other BrainPop Videos on Alternative Energies
Saturday, November 6, 2010
Secure Passwords
Secure Passwords - Explained by Common Craft Release Date: 6-7-2010
What it Teaches
Passwords are essential to using the Web and criminals have become very good at guessing them. This video teaches the risks and how to create a secure password and keep it secret. Includes points on:
What it Teaches
Passwords are essential to using the Web and criminals have become very good at guessing them. This video teaches the risks and how to create a secure password and keep it secret. Includes points on:
- Common risks related to passwords
- Creating a secure password
- Keeping your password secret
- Risks of using shared computers
Monday, November 1, 2010
Disclaimer
Students,
Please copy this Disclaimer in on to your blog.
In a TEXT Widget
Widget Directions
Disclaimer:
This is a blog dedicated to my reflections on learning and my learning about blogging. This is a learning environment! My work is not perfect, there are typos, spelling mistakes, grammar mistakes, and at times difficult sentence formations. You are welcome to leave a comment that will encourage me in my learning and offer positive suggestions for improvements.
Please copy this Disclaimer in on to your blog.
In a TEXT Widget
Widget Directions
- Appearance
- Widgets
- Drag a Text Widget area on the right
- Title: Disclaimer
- Paste the text in to the box
- Save
- Close
Disclaimer:
This is a blog dedicated to my reflections on learning and my learning about blogging. This is a learning environment! My work is not perfect, there are typos, spelling mistakes, grammar mistakes, and at times difficult sentence formations. You are welcome to leave a comment that will encourage me in my learning and offer positive suggestions for improvements.
Sunday, October 31, 2010
Web Browser: The Toolbar
The most useful buttons on your browser toolbar include:
Back -- Returns you to the previous page
Forward -- Returns you to a page you have backed up from
Recent Pages -- Shows you a list of the most recemnt pages you have viewed
Home -- Takes you to a home page specified in the browser preferences
Reload or Refresh -- Downloads the web page from the server again
Stop -- Stops the browser from loading the current page
Back -- Returns you to the previous page

Forward -- Returns you to a page you have backed up from
Recent Pages -- Shows you a list of the most recemnt pages you have viewed
Home -- Takes you to a home page specified in the browser preferences
Reload or Refresh -- Downloads the web page from the server again
Stop -- Stops the browser from loading the current page
Acronyms
Domain Types
.edu = educational site (http://www.tas.edu.tw/)
.com = commercial business site (http://www.amazon.com/)
.gov = U.S. government/non-military site (http://www.whitehouse.gov/)
.mil = U.S. military sites or agencies (http://www.army.mil/)
.net = networks, Internet service providers, organizations (www.comcast.net)
.org = non-profit organizations and others (http://www.netsmartzkids.org/)
.us = United States
.tw = Taiwan
Endings
.html = web page on Macintosh
.htm = web page on PC
.gif = graphics interchange format
.jpeg= joint photographic expert group
.pdf = portable document format
.asp = active server pages
The 5 W’s of Web Site Evaluation
WHO
Who wrote the pages and are they an expert?
Is a biography of the author included?
How can I find out more about the author?
WHAT
What does the author say is the purpose of the site?
What else might the author have in mind for the site?
What makes the site easy to use?
What information is included and does this information differ from other sites?
WHEN
When was the site created?
When was the site last updated?
WHERE
Where does the information come from?
Where can I look to find out more about the sponsor of the site?
WHY
Why is this information useful for my purpose?
Why should I use this information?
Why is this page better than another
©2001-2009. Kathy Schrock. All rights reserved. Page may be reproduced for classroom use.
Thursday, October 28, 2010
Change Background
- Click on Apperance in the sidebar
- Background
- Select a Color
- Click the color you want
- Save Changes

How Insert a Link
- Click on Links in the sidebar
- Add New
- Title the Link in the Name text box
- Paste the URL from the web address into the Web Adress text box
- Check the correct Link Category
- Add Link

Wednesday, October 27, 2010
How to Insert Image Gallery (as thumbnails) with Captions
Within a Post
When you are done Publish
To Add Captions
[gallery orderby="title"]
- Insert a picture
- Select Files or Browse
- Navigate to where they are saved
- Choose Thumbnails, right corner, to see the images
- Open each image
- Select Upload in needed
- Save All Changes
- This opens the Gallery
- Make sure you leave it as attachment page so you can later add captions.
- You can reorder the images if you prefer
- Insert Gallery


When you are done Publish
To Add Captions
- View the actual blog
- Click once on the picture you want to add the caption to
- Click Edit
- Type in the Caption
- Update Media
[gallery orderby="title"]
Monday, October 25, 2010
Wordle
Wordle is a toy for generating “word clouds” from text that you provide. The clouds give greater prominence to words that appear more frequently in the source text. You can tweak your clouds with different fonts, layouts, and color schemes. The images you create with Wordle are yours to use however you like.
HINTS:

- Open a Word document and type in your word selections OR type directly into Wordle and remember to copy after each edit.
- Open Wordle from the Internet
- Select Create
- Paste your words, check the ~ mark for extra spacing
- Select GO
- Adjust the Font, Color, Layout
- Print Screen Hot Key (upper right, next to F12)
- Open Microsoft Office Picture Manager (icon in Taskbar)
- Paste, make sure you are on the desktop folder in the list on the left
- Crop the image:
- Edit Pictures
- Crop- Drag in to crop
- Select OK and it will crop
- Save it --> File, Export .. Select Location, Name it, Select JPEG format
- OK
- Insert it into your Post!
HINTS:
- Make sure you always copy your text before you hit GO. You CANNOT edit it later.
- Word document will let you spell check
- Word allows you to not worry about copying
- The more times you type in the same word the BIGGER it gets
- Use the tilde character ~ between words that go together. Nancy~Gorneau the tilde will be replaced with a space. You will need to check when you paste that there is no extra space
- Commas, semicolons; and paragraph marks
are all seen as a space

Thursday, October 14, 2010
What File Types are Supported in the Word Press Blog?
Images
.jpg
.jpeg
.png
.gif
Documents
.pdf (Portable Document Format; Adobe Acrobat)
.doc, .docx (Microsoft Word Document)
.ppt, .pptx, .pps, .ppsx (Microsoft PowerPoint Presentation)
.odt (OpenDocument Text Document)
Audio
.mp3
.m4a
Video
.mp4, .m4v (MPEG-4)
.mov (QuickTime)
.wmv (Windows Media Video)
.avi
.mpg
Wednesday, October 13, 2010

Tuesday, October 5, 2010
Save the Graph
- Right click in the upper left corner of the Column Graph when in Excel
- Copy
- Open Paint, from Desktop OR--Start, All Programs, Accessories, Paint
- Paste
- Drag the corners in to reduce the white space
- Save
- File Name: Title the bar graph
- Save as type: .JPEG

Monday, October 4, 2010
Make a Booklet in Word
Dear Mrs. Fox's Students,
You are going to print your story as a booklet.


You are going to print your story as a booklet.
- Open your story
- Save As PersonalNarrativeBooklet
- Click on Page Layout
- Change Orientation to Landscape
- Click on Margins
- Click on Custom Margins (bottom choice)
- Change the Multiple Pages to: Book fold
- Change the Sheets per booklet: Auto
- OK

- Insert a Page Break when you want to go to the next page
- Insert -> Page Break
- Save
- Print
- Properties
- Finishing
- Check Print on Both Sides
- OK
- Once it has printed correctly close Word


Good Reads Widget on Your Blog

Skip the next question
You can now add your books
Add a widget to your blog
Click on My Books, Scroll down to Widget and click it once

Copy the first widget code

Open Blog
Appearance-> Widget
Drag the TEXT widget to the sidebar
Paste the code
Title the Text box
Save
View your blog
Sunday, October 3, 2010
Add YouTube Video
Embed a YouTube video into your blog and explain the message.
- Click on the TV icon
- Paste the Video ID for your particular video
- It is the letters and numbers between the equal sides
- Insert

Saturday, October 2, 2010
Add Your Survey to the Blog
- Login to your GApps email
- Within Mail select the email from Google Docs: Here's your form
- Once the email is opened select the link: Need to send the form to more people? Go to:
- Cancel the message to send to more people
- In the upper right corner select More Actions, Embed
- Copy the URL (Universal Resource Locator) the web address
- Login to your blog
- Create a New Post
- Title the Post: Human Impact Survey
- Select the HTML tab from the toolbar
- Paste the URL into the HTML tab
- Publish
- This will insert your survey directly into your blog


Friday, October 1, 2010
Saving an Image from the Web
- Move your mouse over the graphic/image
Windows users: Click the right mouse button. A pop-up box appears.
Macintosh users: Hold the Control key and click. A pop-up box appears.
- Select Save Picture As...
- Select the location you wish to save the image to
- You can accept the current file name or rename the file. (Graphic files are usually in .gif or .jpg format

Wednesday, September 29, 2010
The Animals Save the Planet – Meerkat Traffic
[youtube:http://www.youtube.com/watch?v=jCQdXXkJD_8&feature=channel]
The Great Pacific Garbage Patch – Good Morning America
[youtube:http://www.youtube.com/watch?v=uLrVCI4N67M]
The Animals Save the Planet – Leopards Hate Litter
[youtube:http://www.youtube.com/watch?v=VvFsMe8_NIM&p=39A8B21DB7AA91B6&index=6]
The Animals Save the Planet – Elephant Shower
[youtube:http://www.youtube.com/watch?v=h8Ek3v1RBEU&p=39A8B21DB7AA91B6&index=9]
The Animals Save the Planet – Romancing The Bag
http://www.youtube.com/watch?v=VzsQwwnqSGo&p=39A8B21DB7AA91B6&index=7&playnext=2
The Animals Save the Planet – Lions Recycle
[youtube:http://www.youtube.com/watch?v=xUeNyPTjfec&p=39A8B21DB7AA91B6&index=5]
The Animals Save the Planet – Polar Bears Overheating
[youtube:http://www.youtube.com/watch?v=rmNqpKbH0co&p=39A8B21DB7AA91B6&index=2]
The Animals Save the Planet – Energy Efficient Penguin
[youtube:http://www.youtube.com/watch?v=_kocZ-j-o3I&p=39A8B21DB7AA91B6&index=3]
The Animals Save the Planet – Dog On Standby
[youtube:http://www.youtube.com/watch?v=oNtX3m9UajQ&p=39A8B21DB7AA91B6&index=11]
The Animals Save the Planet – Electric Eels
[youtube:http://www.youtube.com/watch?v=5PqiSMtbxhY&feature=related]
How do I embed a video from YouTube?
Embed a video link in a post:
From YouTube:

type in open bracket no spaces youtube:the URL closed bracket

Save Draft or Preview then Publish
From YouTube:
- Copy the URL of the Youtube Video from the address line
- Add or Edit a post
- Click the HTML tab in the upper right of the toolbar

type in open bracket no spaces youtube:the URL closed bracket

Save Draft or Preview then Publish
Tuesday, September 28, 2010

Monday, September 27, 2010
Keyboarding Technique
Does the student display correct body posture?
Does the student display correct arm and hand position?
Does the student display correct key stroking?
- Spine straight, against back of chair, leaning slightly forward from the waist.
- Centered in front of keyboard (body directly in front of "J" key).
- Sitting a comfortable distance from keyboard (a hand span is suggested).
- Feet on the floor (if possible), slightly apart for body balance.
Does the student display correct arm and hand position?
- Arms relaxed; elbows naturally close to body.
- Forearms nearly parallel with slope of keyboard.
- Fingers curved, tips of fingers resting lightly on keys.
- Hands close enough together to "lock" thumbs. Fingers upright, not leaning toward little fingers.
- Hands and wrists "quiet," almost motionless.
- Wrists low, but palms of hands not resting on the keyboard.
Does the student display correct key stroking?
- Beginning and ending all keystrokes at home row position.
- Keying each key with the correct finger.
- Keying the space bar with the thumb of the right hand.
- Shifting with the appropriate "little" finger.
- When shifting, when depressing shift key, when striking key, when releasing shift.
- Using the "little" finger of the right hand for the enter or return key.
- Keeping eyes on copy (text, screen, board, etc.) rather than the keyboard, once a key has been learned.


Sunday, September 26, 2010
Avatar, NY Zoo and Aquarium
 Here is another fun avatar you can build from the New York Zoo and Aquarium. You can add animal body parts as well as human.
Friday, September 24, 2010
Blog Checklist

- Password Changed (Users, Your Profile)
- Title Changed (Settings, General)
- Tagline Changed or Deleted (Settings, General)
- Header Changed (optional, depends on theme) (Appearance, Header)
- Background Changed (optional, depends on theme) (Appearance, Header)
- Categories (Varies by teacher) (Post, Categories)
- Reading, Writing, Math, Science, Social Studies, My Current Events, other
- Posts, Categorized (Posts, Edit)
- Link Categories (Links, Link Categories)
- Teacher's Blogs
- Student Blog's
- Homework
- Link to Mrs. Gorneau under Teacher's Blogs category (Link, Add New) (Select Category)
http://tasblogs.tas.edu.tw/wpmu/gorneaun/ - Link to Homeroom Teacher under Teacher's Blogs category
Use the links on my blog page under Teachers' Blogs for your teacher's blog address - Link to:
Math Connects
FOSS Science
Typing Pal - About page updated with image (Pages, About)
- Hello World Post Deleted (Posts)
Thursday, September 23, 2010
Math Connects
Great professional development on ExamView during our PD day Wednesday. The teachers where exposed to a wealth of information on how to create, administer, and grade math pretests, quizzes, tests, mid terms, and finals to go paper free in the future. We are still exploring the reporting options.

Tuesday, September 21, 2010
How do I post to a page?
Q: Can I get a new post on a page?
A: You don't. A page does not allow multiple posts. You need to enter each new topic above the last one typed in on a page. You should be posting everything under Posts and then adding categories to classify them ie. My Reads, Math, Science, Current Events, etc...
A: You don't. A page does not allow multiple posts. You need to enter each new topic above the last one typed in on a page. You should be posting everything under Posts and then adding categories to classify them ie. My Reads, Math, Science, Current Events, etc...
Monday, September 20, 2010
Student Blogs
Students in grade 3-5 are creating their own e-portfolio blogs this week. They are very excited and are doing a great job.

Lesson One:
Lesson Two
Lesson One:
- Login
- Change password >Users>Your Profile
- Change Header image >Appearance>Header
- Change blog Title >Settings>General
- Change or remove Tagline >Settings>General
- Edit the About page >Pages>About
Lesson Two
- Upload image Avatar or Scanned >Click the Add an Image next to Upload/Insert
- Select Files
- Navigate to the saved location of the Image
- Scroll down to Insert into Post
- Delete Hello World (default post) from Posts
- Add pages for these subjects
- Reading
- Writing
- Science
- Math
- Create links to teacher's blog, Mrs. Gorneau's blog, GApps, Typing Pal, Math Connects, FOSS, other sites of interest.
- Explore widgets
- Type their first blog
- Comment on each other’s About and first post
- Approve Comments
How do I insert a horizontal line?
A horizontal line is a visual separation between paragraphs, thoughts, or topics.
If you want to add a horizontal break between entries you may do so by using the HTML code <hr>.
Type your text and then press the Enter key to leave a line break.
You need to select the HTML button on the format toolbar.
Position your cursor where you want the horizontal line and type in <hr>
Switch back to Visual and Update the Page.
Monday, September 13, 2010
Avatar, Lego
Students in 3rd grade created Mini-Mizer Avatars, a computer representations of themselves, from the Reasonably Clever site. They will use their creations on their About pages of their blogs. The students were very excited about being able to change the different aspects of the avatar. There are 19 different objects they can change from head gear, eye color and style, to holding items and a few different backgrounds. Some really thought about it and made it look just like them. Others made it look like their favorite super hero or character from a movie.
Can you guess which one is mine?
Can you guess which one is mine?
Wednesday, September 1, 2010
Comment Guidelines
A Great Comment:
- contains a compliment,
- causes a reflection,
- uses school appropriate language
- has been proof read.
Includes one or more of the following:
- asks a question,
- makes a connection (to an idea or links to an example),
- piggy backs on an idea,
- restates or summarizes the idea/s in the post.
- creates the need for a reply.
Monday, August 23, 2010
PrintWhatYouLike

What it is: "Tired of printing web pages only to find your printout is full of ads, empty space and other junk you don't want?" (from website) Tired of wasting paper and ink? PrintWhatYouLike is a Free online editor that lets you format any web page for printing in seconds!
You can delete ads, empty space, and the extras that you didn’t want. PrintWhatYouLike works in three easy steps: 1. Open the website for PrintWhatYouLike and paste the URL of the page you want to print, 2. Edit the page, 3. Print it! Very easy and a great way to cut down on ink and paper.
Nothing to download it runs directly from your browser. You can make the page you are printing more readable by changing font size and typeface and removing the background. PrintWhatYouLike gives you the ability to combine multiple web pages by editing them and printing them as one document. You can even save your modified page as a PDF or HTML document.
How to integrate PrintWhatYouLike into your curriculum: Introduce students and other teachers to PrintWhatYouLike for printing web pages. Post instructions for using PrintWhatYouLike next to classroom computers, printers, and in the computer lab. Add it to the bookmark bar in your favorite browser or add the bookmark editor directly to your browser.
Thanks to Kelly Tenkely for posting this great information to her site: iLearn Technology
NetSmartz

What it is: Technology is rapidly changing how we teach and learn. The Internet in particular expands our classrooms walls to the rest of the world. Netsmartz Kids teaches students about being safe online through fun songs, characters, videos and interactive games. The site does not link to any outside sites. It is safe and easy to use.
How to integrate: Netsmartz Kids introduce your students to the rules of the web through songs and games. Netsmartz Educators offers wonderful activity cards and ideas for using Netsmartz in the classroom. Netsmartz Parents provides on and offline learning activities for parents to facilitate discussions with their children and teens about Internet safety.
WebSense Internet Safety Agreement
This week we are focusing on Internet safety and how we handle tricky circumstances. The students and I are discussing each question on the agreement in order to gain a complete understanding of what each one means.
These are the guidelines that we will be following:
These are the guidelines that we will be following:
- I will remember that information is valuable on the Internet and I will keep my own and other classmates personal information private. [Check that posted images don't share personal info.]
- full name (first and last)
- street address
- name of school and or school address
- e-mail address
- phone numbers
- passwords
- calling card numbers
- mother’s maiden name
- parent’s place of work
- photos in which you can be recognized, other people’s photos
- other people’s names: friends, teacher, classmates
- I will keep my password or password hint private, even from my best friend. I will only share it with my parents when I am asked.
- Everything that I write, create, or search for using my digital tools will have an educational purpose that my teacher knows about and has given me permission to do.
- I will use school appropriate language when communicating and searching.
- I will only chat online with other TAS students and only when I need to work with other students on a school project and have my teacher’s permission.
- I will delete any emails, junk, spam, chain emails or comments from people I don’t know without opening or forwarding them.
- My school email is for my school work only. I will only share it or enter it to a website only when told to by my teacher.
- I will always give credit when I have used other people’s work. [Citing sources]
- I will only log on as myself.
- I will always log off after using the computer.
- I will check to make sure that my spelling; punctuation and grammar helps me to say what I want to say.
- I will never purposefully collect or use information to gain access to any account or network that I do not have permission to access.
- My teacher will not be included on any friendship network or non-school related communication.
- I will only go to websites that I have permission to go to and check with my teacher if I am unsure.
- If I see a webpage or an email that makes me feel bad or uncomfortable I will close the page and tell my parents or teachers about it.
- I will tell my parents or teachers if someone that I met online wishes to meet offline.
Thursday, August 19, 2010
"Get Up and Go"
I am thrilled and very excited to begin the 2010-2011 school year at TAS and have been delightfully overwhelmed with the student population. The students have been fabulous at responding to questions, politely asking for assistance and are respectful of each other. I was amazed at how well the 5th grade students could keyboard...some 50WPM with 97% accuracy. Not something I have seen a great deal of at other schools I have worked in. The students have been correctly taught to love keyboarding!
We started the year with “Get Up and Go” a unit which discusses:
We have a few more lessons to go in this unit but we are off to a great start. I am looking forward to helping the students be creative, collaborate on units, understand their digital footprints, connect globally to others, and become good digital citizens.
We started the year with “Get Up and Go” a unit which discusses:
- Proper handling and use of a Netbook which all students in grades 3-5 will be using this year
- Carry the Netbook with 2 hands
- Log off when done and passing it to another student
- Shut down when putting it into the storage cart
- Always plug in the power adapter so it can charge the battery
- Use the machine on a table not their laps or arms
- Do not force a machine to shut down, tells a teacher if it will not shut down properly
- Login/Logoff procedures
- User name, password
- Password etiquette
- Creating a new password
- Wiggle the mouse to wake up the computer
- Ctrl, Alt, Del
- Logoff when done
- File management
- Create new folders
- Rename
- Delete
- Access them from within an application
- Navigating to different sites we will be working with this year
- Blogs
- GApps
- Typing Pal
- TAS home page
- Keyboarding
We have a few more lessons to go in this unit but we are off to a great start. I am looking forward to helping the students be creative, collaborate on units, understand their digital footprints, connect globally to others, and become good digital citizens.
Tuesday, August 17, 2010
Friday, August 13, 2010
Tuesday, August 10, 2010
Thursday, August 5, 2010
Email Netiquette
- Always include a brief subject
- Always begin with a greeting: Dear, Hello, Ni Hoa, Hola, etc...
- Capital letters mean you are SHOUTING
- Be clear in your message; it is easy to cause a misunderstanding
- Be kind, respectful, honest, and responsible when emailing
- Use a spell-checker, read it aloud and listen for mistakes, correct grammar
- Always end with a salutation: Sincerely, Thank you, Goodbye, Peace, ZiaJian
- Do not forward mail without the author's permission
- Never type what you would not want your parent, teacher, or friend to read
- Emails ARE NOT private
Subscribe to:
Comments (Atom)